Sunday, December 2, 2007

Lemon Drop Champagne Punch

Martha Stewart Living is one magazine that I recommend investing in, and don't worry, this isn't an "inside" tip that's going to land either of us behind bars. In fact my sister and I invested my mother in a subscription for the past year, and the entertaining guru has only made us better off. Her ideas are endless and she has improved our notion of entertaining, from elegant table settings and eye-catching centerpieces to savory foods and drinks that are ever memorable.
.
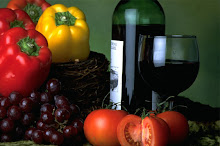
Being that I am from an Italian family, I am sure it is no surprise that our dining room table is the focal point of our home. Not only does my mother get very technical in creating a beautiful table setting presentation, but last Christmas my sister-in-law brought over a Martha Stewart inspired, homemade, centerpiece that certainly added that eye-catching touch. However, this year I hope to bring to the center Martha's Lemon Drop Champagne Punch, which I know will look pleasent, but intend for it to be more pleasing to the palate than the eye.
.
I am certainly a fan of of champagne, I believe lemon complements just about everything beautifully, but this recipe is what first introduced me to candied lemon peels, which I believe give this punch that added pizazz. Sure you can add fresh fruit, raspberries or strawberries, or even lemons, but I think the candied peels are more effective for a winter drink. No matter what your choice of garnish, if you enjoy punch, this is a universal flavour that is sure to please all guests.
.
And don't stop there, visit Martha's new daily blog, The Martha Blog up close & personal, to discover more of her trendiest ideas.

The Recipe

Ingredients: (for 6 to 8 guests)
3 lemons
1/2 cup sugar
1 bottle champagne, chilled
3/4 cup vodka, chilled
4 ounces candied lemon peels

Remove zest from each lemon, juice lemons, and strain pulp. You should end up with 3/4 cup of juice. A trick to removing the zest is to use a vegetable peeler, peeling in a continuous spiral. Lemons are easier to peel, and will release more juice, at room temperature than when chilled.
.
In a saucepan over medium high heat, heat the sugar and a 1/2 cup of water, until sugar is dissolved. Bring to a boil, and remove from heat. Add zest, and let the "syrup" cool completely, about 2 hours.

Pour champagne, vodka, lemon juice, and syrup into a punch bowl, and stir. Serve your glasses of punch with candied peels.
.
Perfect for Christmas, New Year's, and all season long,
.
Haley

Saturday, December 1, 2007

Chocolate Toffee Snowballs

It seems fitting that the first snowfall of the season began just hours ago on my part of the globe. Luckily this year I have found a new way to enjoy the snow just as much as I did as a child, other than having a snowball fight with the neighbours' children. In fact, I say leave the snow outside altogether. Make a snow angel or two for old time sake, but in general, leave the snow outside. Instead, you can enjoy the taste of a nice warm chocolate toffee snowball from right inside your toasty kitchen, which will melt in your mouth in a way that is just a tad bit more tasteful than yellow snow.

I flipped my way through to this "Choco Toffee Snowballs" recipe in the 2008 Milk Calendar that I just received in the mail not to long ago. I got pretty excited when the issue came, as I was talking about my anticipation just a couple weeks prior to its arrival. The anticipation for the calendar being quite the equivalent to my anticipation for some light snow. What you may not be aware of is that, at my house, we have a stack of old milk calendars on our recipe book shelf that we certainly treat as prized possessions. If you are not aware of the milk calendar, then you are definitely missing out on 12 yearly delicious recipes that coordinate with each month's season, as well as about 10 added extras. Just for an idea, flip to this coming year's April and you have a beautiful Salmon and Rice Primavera, turn to July and you have Sensational Smoothies, and move on to October and you have a lovely Sweet Potato Bake with Crispy Garlic Topping. It just makes the year pass through swiftly and that much more pleasant.

So, nearly last, but not least, my eyes stumbled across these choco toffee snowballs near the end of the calendar. Sure, I am getting ahead of myself oh, about a year, but can you blame me? I may have to send some of my candy cane cookies away as present toppers, because these snowballs are making their way up on my winter list of goodies.

The Recipe

Ingredients:
1 cup butter, softened
1/2 cup icing sugar, sifted
1 tsp vanilla
2 1/4 cup flour
1/2 tsp baking powder
1/4 tsp salt
3/4 cup toffee bits
1/2 cup mini chocolate chips

Preheat oven to 375 degrees.

Using an electric mixer, beat butter with sugar until light. Beat in vanilla. Gradually stir in flour, baking powder, and salt. Finally, stir in your toffee bits and chocolate chips.

Roll heaping tablespoonfuls of dough into balls. Place on parchment paper lined baking sheets, a couple inches apart.

Bake for 15 minutes or until lightly golden on the bottom, and firm to touch on the top.

Once baked, sprinkle with icing sugar in case your snowballs need to be a little more snow inspired.

It goes without saying, there is no better Christmas than a white Christmas,

Haley

Sunday, November 25, 2007

Candy Cane Cookies

So you like candy canes, and you love cookies, what then, is better than candy cane cookies. If you are anything like me then candy canes are good to eat sparingly, better appreciated for their festive appearance, and mostly cute as an accent on the top of a present. Cookies on the other hand, are the best snacks of all time that are always good to eat, especially when they have that festive appearance. Candy cane cookies then, give you the best of both worlds. And thanks to good old Betty Crocker, they have been the best part of my winter wonderland since I was a little baker in training, well, mom obviously did the majority of the baking, but I was always a good taste tester.

Candy cane cookies have always been a nostalgic element in my life. As I sifted through my mother's Betty Crocker recipe card library, in search of this very recipe, I could not help but be reminded of so many childhood visuals: me sifting through the recipe cards as a little girl, the image on the candy cane cookie recipe card, my mom's yellow tub of flour, the kitchen...all covered in flour, her rolling pin, my rolling pin, and me sneaking into the freezer to grab just one cookie several times throughout the night.
.
Every Christmas holiday my mother and I put some days aside for baking Christmas cookies, in fact the discussion about making candy cane cookies this year has already come up. These memories cannot even be displaced by the ones of me opening presents on Christmas morning (especially not of the year I balled my little eyes out because Santa brought me ice skates instead of the toy TV and remote control I wanted...that did not exist). Christmas has always been far more about the moments shared with family, and not so much about what was under the tree. I hope I have a little girl one day who I can make candy cane cookies with, and I hope you can enjoy the experience as well.

The Recipe

Ingredients:
1/2 cup butter or margarine, softened
1/2 cup shortening
1 cup sugar
1 egg
1 1/2 tsp almond extract
1 tsp vanilla
2 1/2 cups flour
1 tsp salt
1/2 teaspoon red food colour

Preheat your oven to 375 degrees.

Mix your butter, shortening, sugar, eggs, and flavourings (almond extract and vanilla). Blend in flour and salt. Once blended well, divide the dough in half, and add your food colouring to one half.

One cookie at a time: Shape about "1 teaspoon dough from each half into 4-inch rope". I recommend rolling your pieces back and forth on a floured board, for smooth ropes. Place your ropes (one white, one red...for us, the other usually turns out pink, you could try green food colour or any other as well) side by side, press together lightly, and twist. Curve the top of the cookie to form the handle, and you should have a candy cane cookie! Continue with the rest of your dough and it should make about "4 dozen cookies".

Place on a baking sheet, and bake for about "9 minutes", or until very light brown. The Betty Crocker recipe mentions sprinkling crushed peppermint over your cookies if you wish, however I recommend having them without.

I could not help but notice this recipe is Copyright 1971, well before I was born, but to this day beats any Christmas cookie around. For a time saving twist, try Betty Crocker's new Christmas Candy Cane Cookies (Cookie Mix) recipe, made with her cookie mix found in stores and just 3 other ingredients. But, I do recommend opting for traditional holiday baking!

Freeze your cookies (dividing each layer with wax paper), so you don't eat them all up at once before your guests arrive. Although, that might not stop you since they are just as good frozen ;)

Haley

Saturday, November 24, 2007

An Early Christmas Gift

I would like to announce that I am a new member of the baking group Daring Bakers, and you can expect my name to appear on the Daring Bakers Blogroll this upcoming week! The group is basically a community of people with one main thing in common: we like to bake! And obviously, we like to talk about it! As an early Christmas gift, per say, I have received the groups logo:


...which you may have noticed me sporting on my blog (side bar). I hope to share with you some of the "challenging" recipes I come across while being a part of this group, and I hope that from the group's blogroll you will check out some of the active members' personal baking blogs. As the group welcomes non-bloggers as well, I encourage people to join!

We knead to bake,

Haley

Thursday, November 22, 2007

My "Favourite Thing" this Christmas

While it is undeniable that everyone is still talking about Tuesday's episode of Oprah, the annual "Oprah's Favorite Things 2007" episode (where she shows off her 20 or so favourite gifts to give this Christmas), I am still talking about Giada De Laurentiis's appearance on the show just a week before. Sure all of the items that made Oprah's list, including the Samsung camcorder (approximate value: $800), Ugg crochet boots ($120), crystal watches ($150-$1500), KitchenAid Artisian mixer ($350) and panini press ($100), to name a few, were all amazing gifts. Even more, I am sure that all of the audience members who were given one of each item to take home felt just as amazing, especially considering that this year's gifts included the most expensive gift to make the list in "Oprah's Favorite Things" history: an LG stainless steel refrigerator ($3800), with a built in TV, DVD hookup, radio, digital photo display, more than 100 built-in recipes, and that is about enough to get a grasp on all the Christmas excitement that is surrounding the show.

But back to reality for a moment...
Holiday recipes, as seen on Oprah the week prior, is my favourite thing this Christmas.

It is hard to believe that Christmas is just around the corner, just about one month away too be exact. With your Christmas tree, decorations, and lights already or nearly already up, it is now that time to begin preparing your holiday menus, and to be creative while you are at it. One of my favourite Christmas edibles is antipasto, the Italian equivalent to hors d'oeuvre, meaning before the meal (anti = before, pasto = meal). While I am used to delicacies, cheeses, and marinated vegetables, which never get old, Giada De Laurentiis's Easy-to-Make hors D'oeuvres may make your first creative steps in preparing your holiday meals that much easier.

Experimenting with hors d'oeurves can be a lot of fun, and even more fun actually eat them. One of Giada's recipes that I have been exercising is her fried ravioli. Never had I thought of enjoying pasta this way, but having tried making mine with simply a basic cheese ravioli, I certainly did enjoy it tremendously. (While frying the ravioli I was reminded of a trick I learned to do with leftover pasta: instead of reheating your pasta in the microwave or in a saucepan, put your leftovers in a frying pan, add some oil and mozzarella cheese, and fry 'til crunchy. This is the one and only way I actually enjoy leftovers as much, if not more, than the fresh meal.) The concept of fried ravioli closely reminded me of fried won tons that you can get at your local Chinese restaurant, made from the traditional style of won tons used in won ton soup; both ravioli and won tons are a traditional stuffed pasta per say, now put to an entirely new flavour and given a new tasty texture. I am going to experiment with the fried ravioli again soon, with maybe a meat and spinach, sausage, or vegetable filled ravioli, which are some ideas I recommend as well, as I definitely recommend serving this recipe in general for a definite crowd-pleaser!
.

I find this recipe quite straight forward and the process is similar to the breading and cooking of meats and vegetables.

Now, if only I had that LG refrigerator to store my ingredients in,

Haley

Saturday, November 17, 2007

Haley's Pork Chops

I am not one to brag, but it has been far too long for my pork chops to have not made an appearance on my blog, being that I have never made pork chops without people preaching about how good they are.

To get your taste buds in motion...
This week a few of the ladies in my apartment were getting together for dinner, which is not a rare occasion, and being that it was at my place I decided to make a nice shrimp fettuccine alfredo and some greens. However, being that I am my mother's daughter the menu certainly could not stop at just that. And so I decided I would prepare some of my favourite pork chops because they are easy to make, and more importantly, they are always critiqued well. When making my alfredo sauce I experimented a bit, adding garlic and white wine, which I had never added to my original alfredo. This experiment was going to end up on my blog, however, once again, my pork chops out-shown what was supposed to be the highlight of the meal, and I thought it would be wise to just put the uninteresting alfredo on the back burner.

Now, I can tell you story after story about exactly how delicious these pork chops are, or I can let your try them for yourself. I hope your taste buds are at full speed, because I am letting my secret loose.

The Recipe

Ingredients:
boneless pork chops, thin fast fry
olive oil
garlic, diced
onions, sliced
red peppers, sliced
white wine
lemon, and fresh squeezed lemon juice
lemon pepper
parsley flakes

Note: Never be afraid to experiment by adding new flavours; this recipe began with only 3 ingredients aside from the pork chops (olive oil, onions, and lemon juice).

Marinate your pork chops in an olive oil, garlic, lemon juice, and lemon pepper marinade, for several hours. You can prepare them the night before, or the morning of. However, I sometimes marinate just several minutes before and they will still turn out tasty.

Line a large frying pan with olive oil, and saute a hearty amount of garlic, onions, and red peppers. You do not just want to add these ingredients for appearance or minimal flavours, rather, you want to be able to fill your pan.

Once your vegetables are soft, discard the marinade from your pork chops and place them in the pan. Allow the chops to cook on both sides, adding white wine and lemon juice to the pan to keep them from burning. Do let your pork chops brown, but keep adding liquids right before they are about to burn. It is almost like you are playing a game with them; you want to make sure your chops brown, yet you want to keep them fairly moist. Your juices should eventually be browning and have a rather thick consistency.

Add lemon pepper and parsley flakes to taste, and I sometimes add entire rings or wedges of lemon to the pan. Your final result should be browned chops, bathed in "sticky" juices and vegetables.

I was watching The Main tonight, on the Food Network, and Chef Anthony Sedlak referred to the mushrooms that he topped off a beautiful red snapper with, as having "a sticky texture that's kind of sexy". And that is exactly how I want to refer to the garlic, onions, and peppers that are smeared in with my chops.

Haley

*Read more about The Main, on a blog in conjunction with the Food Network, Food for Thought.

Friday, November 16, 2007

French Onion Soup

The weather lately has had me craving a nice hot bowl of french onion soup, and I got around to making some this week, one day at 3:00 in the afternoon. One thing I like about french onion soup is that you can have it as an "in between lunch and dinner snack", especially good when you are walking in from a chilly fall walk after a 2:30 class or appointment. You know, when an afternoon coffee just will not due.

Now, my french onion soup is one that is easy, and fast! To me, an onion and beef broth based soup should not be time consuming and should be able to wear the title of a homemade soup that can be thrown together nice and quick, on days when it is a snack well-needed. It is a "cup of tea", that sure beats - a cup of tea.

The Recipe

Ingredients:
2 to 3 large sweet onions
butter (few tbsp)
black pepper, to taste
red wine
beef cubes (or french onion soup mix)

french baguette
garlic powder
parmigian cheese
olive oil (or Swiss or Gruyere cheese)

In a large saucepan, melt butter and saute your onions until golden, adding pepper to taste. I like adding a lot of pepper, making sure my onions are visibly seasoned, which will give your soup a noticeable bite. Add red wine, to taste, which will also give your onions and final result of your soup some colour.

Add water to the pan, enough so that your onions are paired with a good amount of broth. Bring to a boil, adding your beef cubes (or french onion soup mix). Once your broth has gained its deep colour, turn to low heat and allow to simmer.

While your soup simmers, preheat your oven to 350 degrees. Cut your baguette into slices just about 1 inch or so thick, keeping it on the thinner side. Lay your slices on a baking tray and add a spread of butter to each, topped with a sprinkle of garlic powder, and a generous amount of parmigian cheese. Add an additional cheese of choice if your appetite prefers, otherwise just drizzle over with olive oil. If you are adding another cheese besides parmigian, you may not necessarily need or want to add oil.

Bake you baguettes briefly, until the cheese is melted and they are browned and crispy. Once they are done, remove your soup from heat. You can eat your baguettes alongside your soup, or for the more traditional experience, place them directly atop your soup and eat directly from the bowl.

Who knew what was historically known as "food for the poor people" could be so good,

Haley